Rendering in Blender
release date :
- 3D-Animation

Table of Contents
Introduction
M here with another article on Blender!
Today, our team thought it would be helpful to go over rendering in Blender.
These basic-to-intermediate topics will be covered:
- What is rendering
- Commonly used render properties
- Viewport settings to optimize Blender while modeling
Note: This article will be using Cycles as the default render engine.
What is Rendering?
Rendering is the final step of your project within Blender.
You send your model through something called a render engine that will do all the necessary calculating before giving you a final image.
Think of it like taking an instagram photo of your food.
You move your plates and angle your camera before taking a picture.
Depending on your camera, lighting, and settings you’re going to get different results, right?
This is similar to how rendering works.
How do you Render?
To render you need 3 things:
- An object
- A light source
- A camera
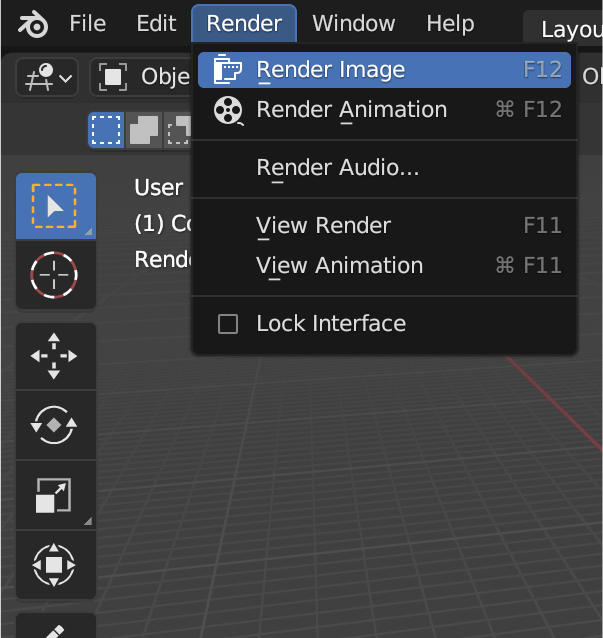
Rendering can be done by clicking Render > Render Image.
The default shortcut is F12 (Fn key or the Globe key + F12 on Mac).
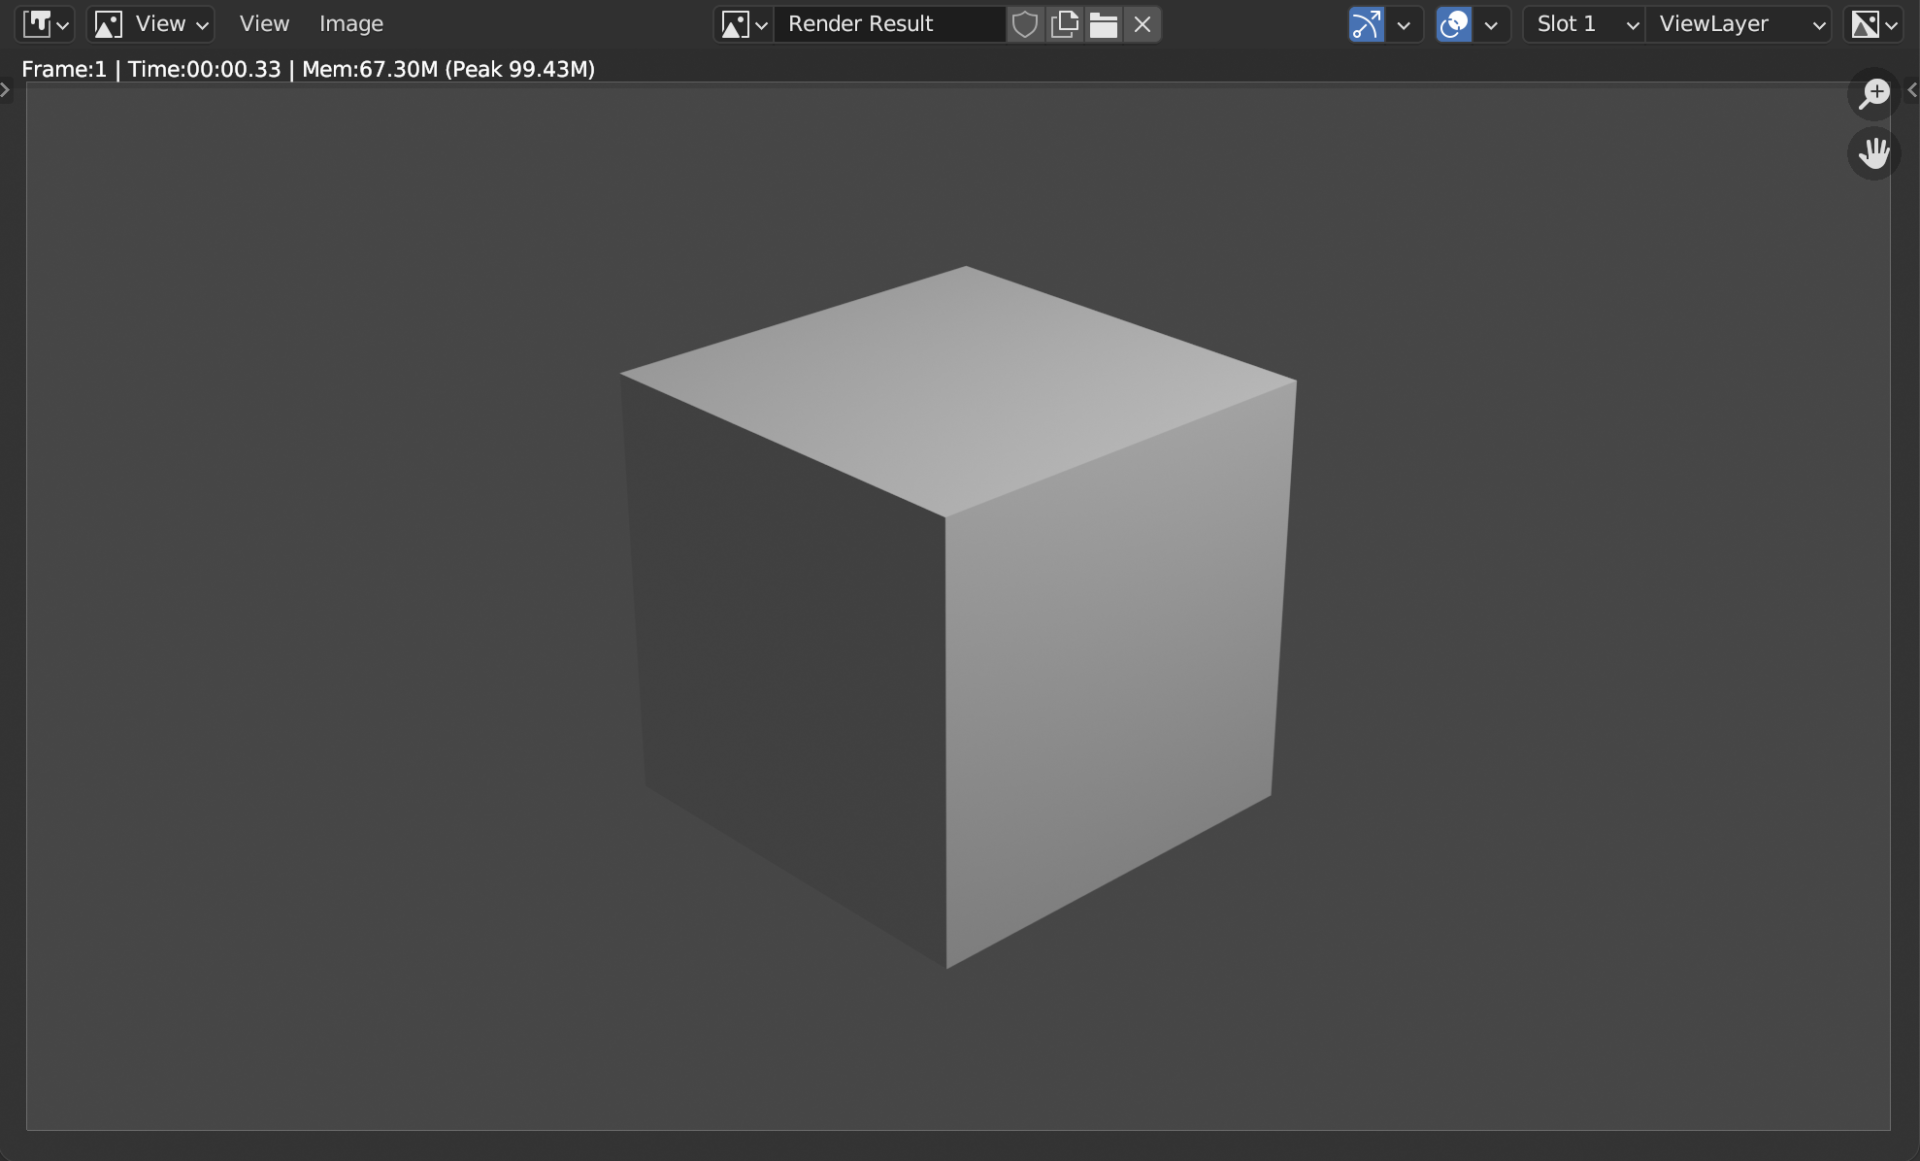
This will render using the camera you have set in your scene.
Saving
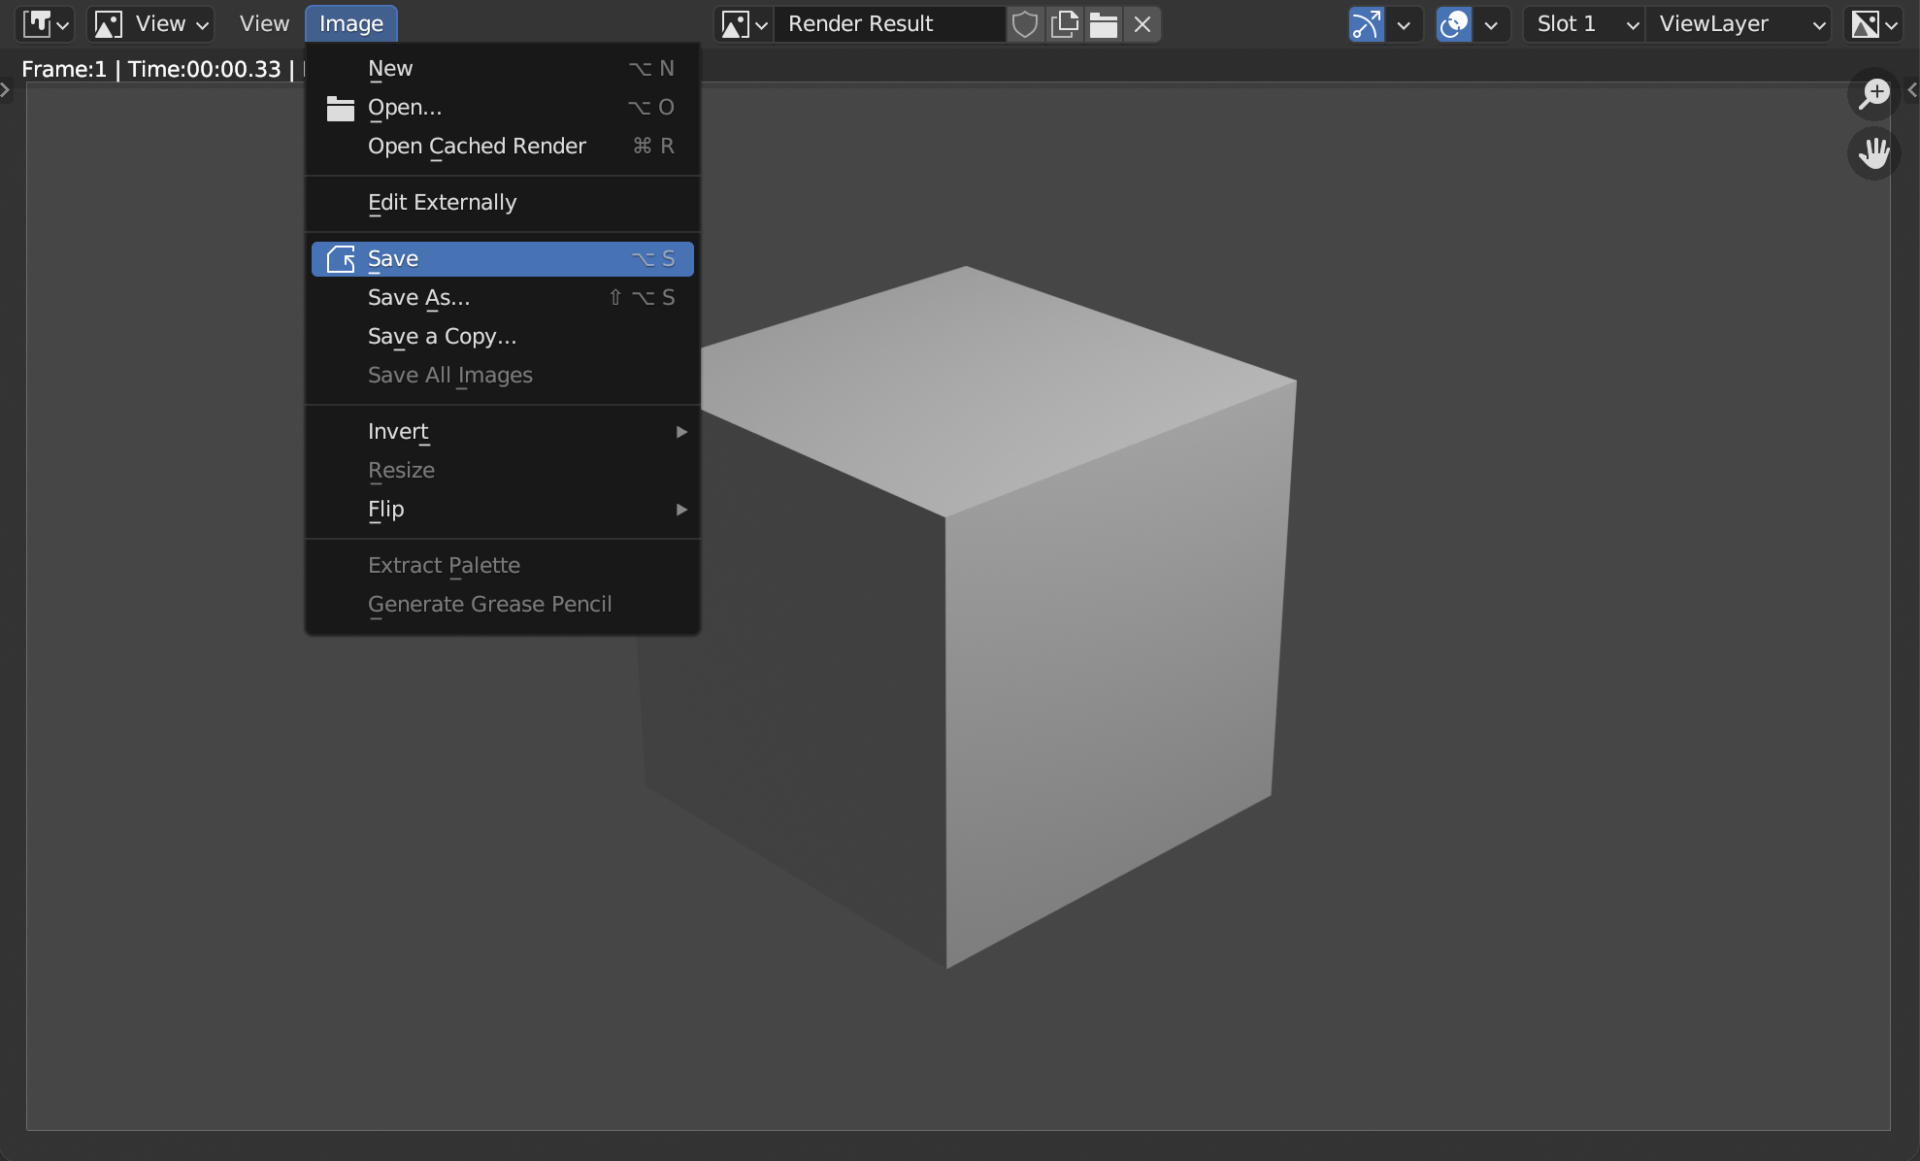
The Blender model and render are two different files, so saving is necessary when you complete a render.
You can perform a save by selecting Image > Save.
The default shortcut is Ctrl + S (Option + S on Mac).
Slots
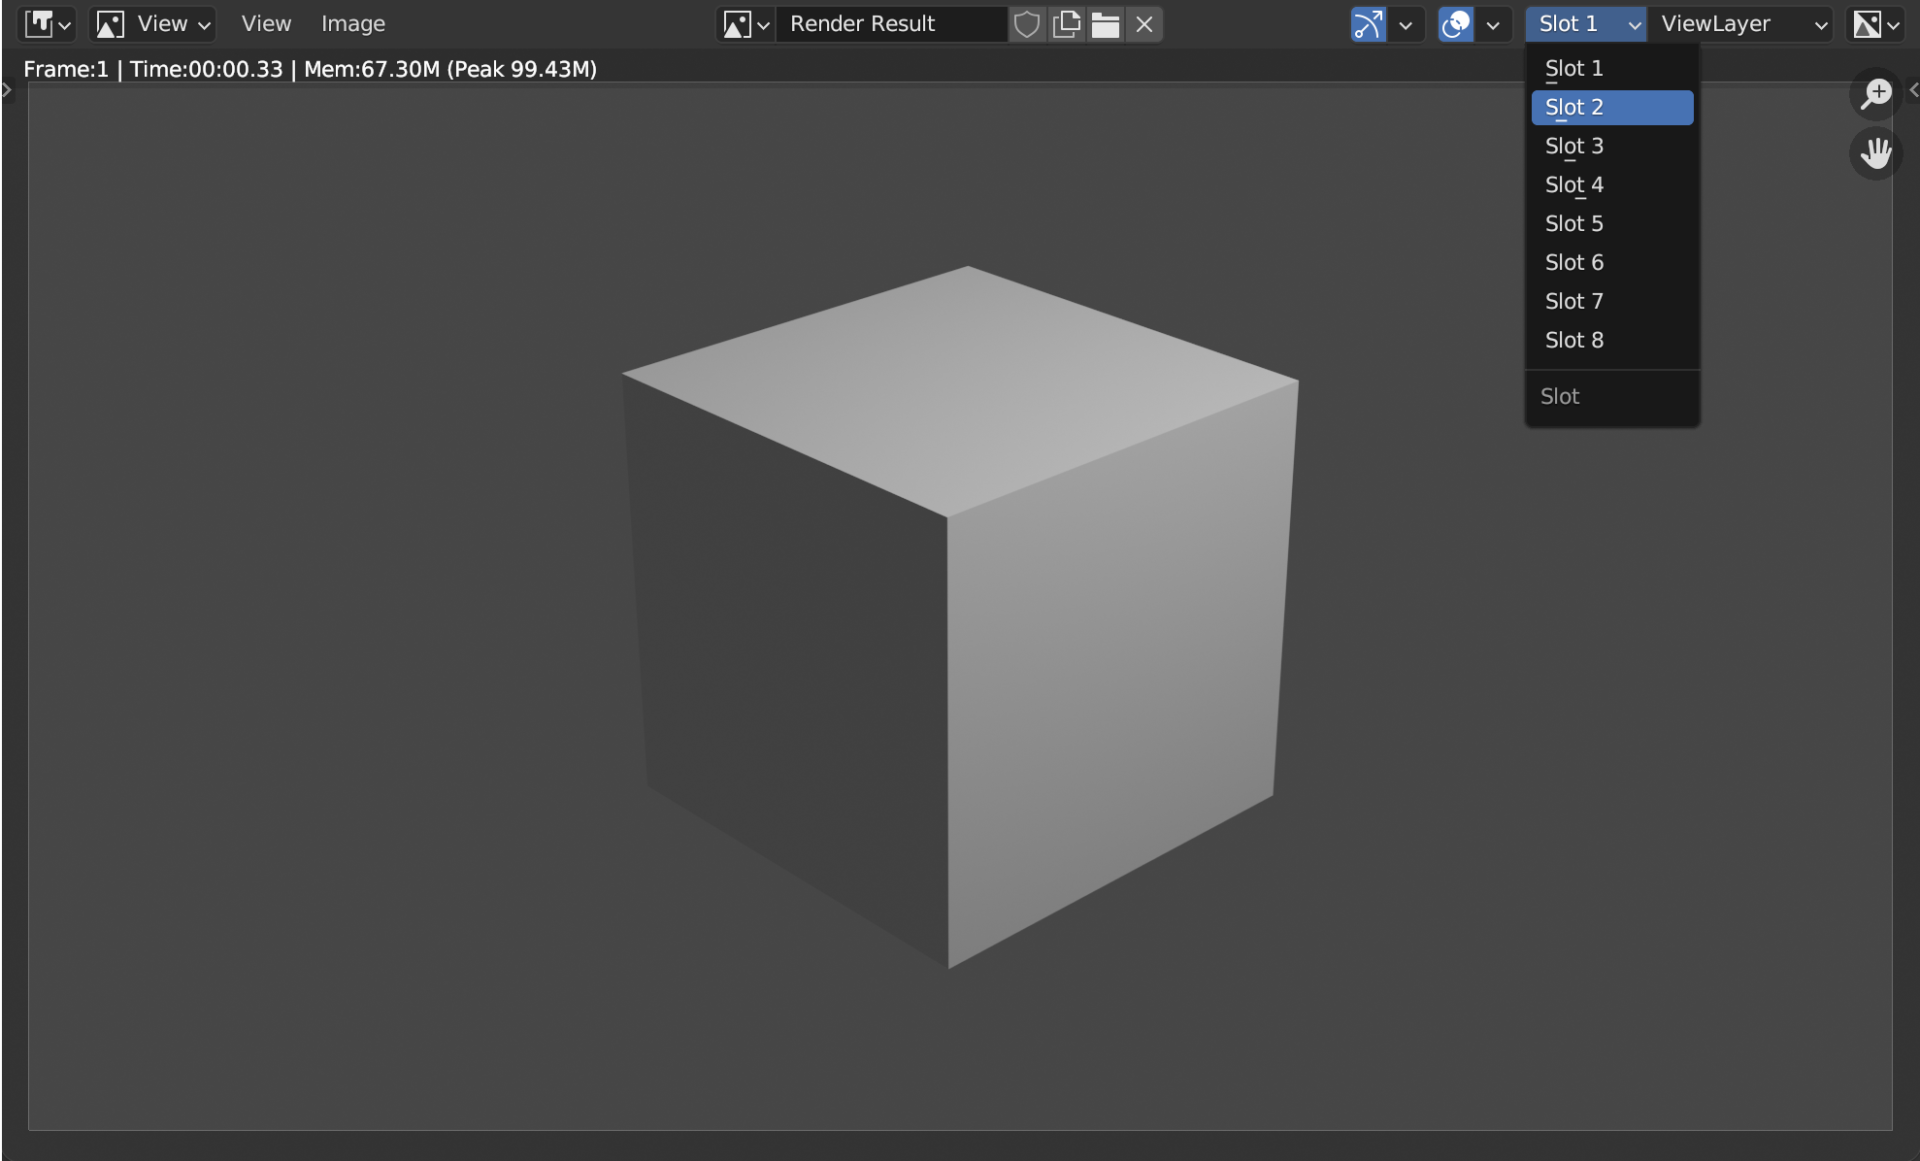
In the render window, there are slots where your render will go to.
If you render something, by default it will save to Slot 1.
You can change the slot it saves to by clicking the drop down window and selecting Slot 2.
The benefit of this is comparing two renders of the same image by switching between slots.
Previewing a Render
Another important step before rendering is previewing your render.
You can preview your render by clicking the Rendered Viewport icon in the top right corner of your viewport.
Note: You may need to scroll down on the top toolbar to see it.
In this view, you can get a better idea of what the render will look like.
The default shortcut is holding the z key and hovering over Rendered in the pie menu.
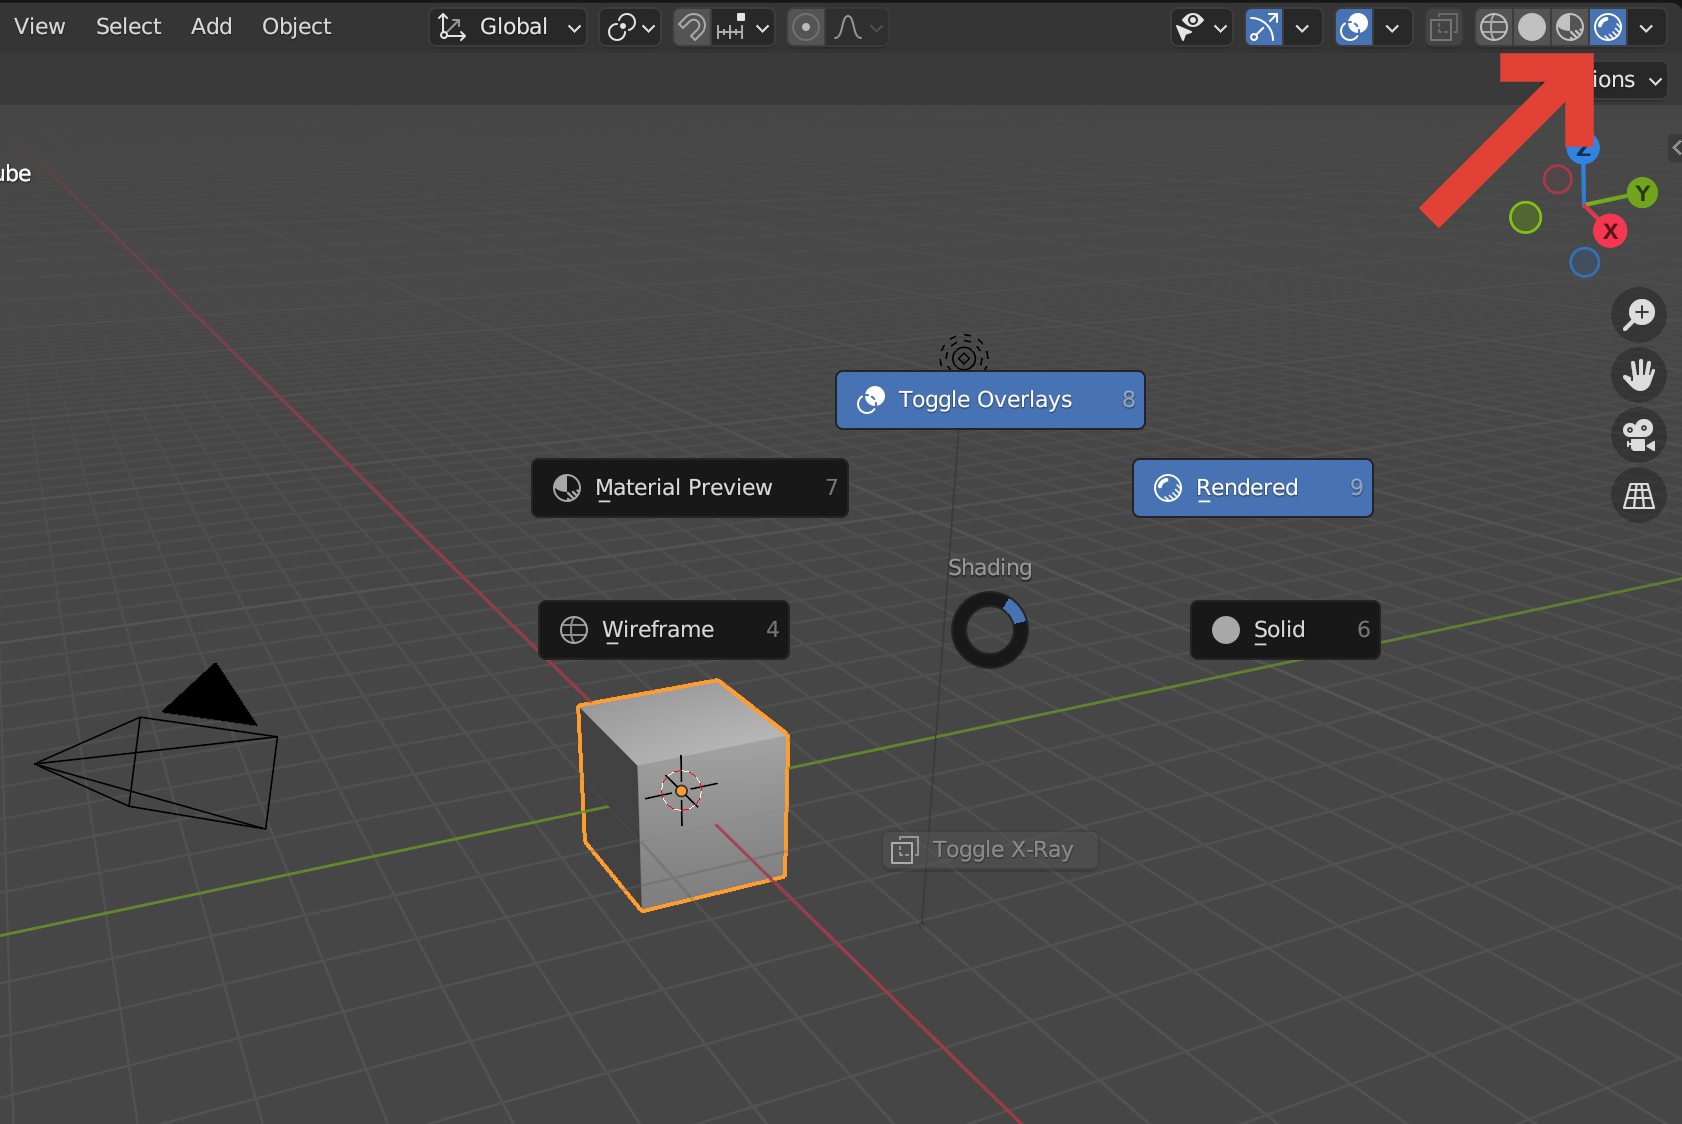
Each time you change something, or move around your scene, your computer will recalculate the information while you’re in the Rendered Viewport.
This can be taxing on your computer, so there are separate settings for the viewport preview and the actual render.
On that topic, let’s talk about optimizing settings for rendering and while using Blender.
Preferences
Before changing render settings, let’s set the hardware your computer will use to render.
Setting your preferences will effect the render tab settings, which is explained further down.
Changing your hardware preferences can also greatly decrease render times.
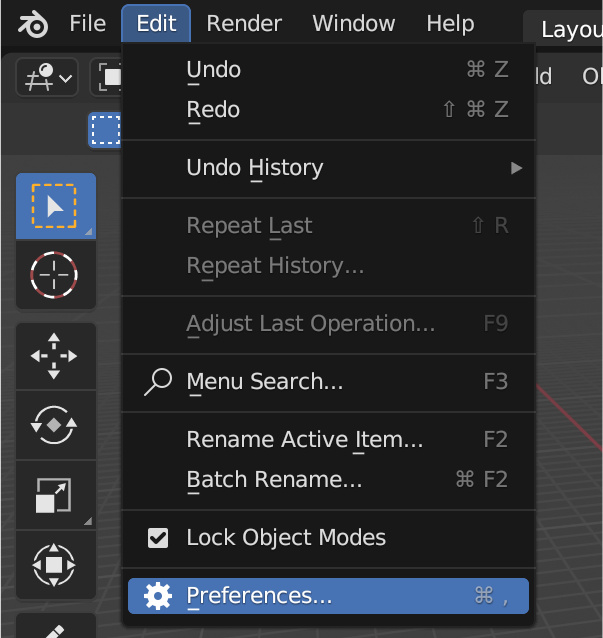
This is accessed through Edit > Preferences > System > Cycle Render Devices.
You can enable the preference by making sure the boxes are checked.
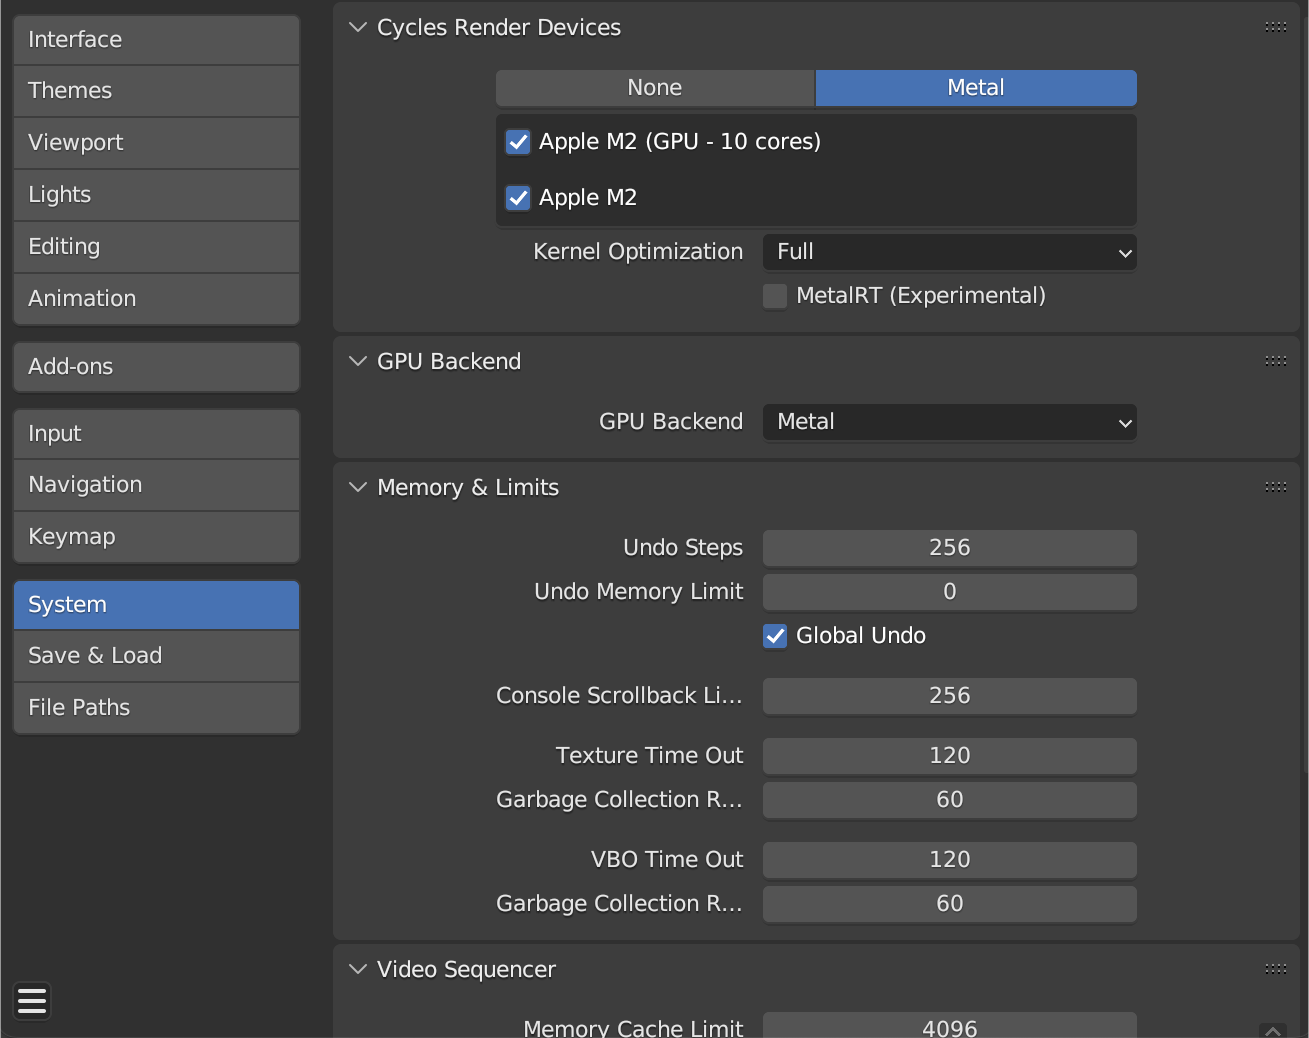
Below is a list of available settings.
Most of these options will not appear as Blender will only show settings based on your computer’s hardware.
| CUDA | Nvidia GPUs with 3.0 compute capability or higher |
| Optix | Nvidia GPUs with 5.0 compute capability or higher Driver version of 470 or higher |
| HIP | AMD GPUs and APUs that use Vega architecture |
| Metal | Apple Silicon chips macOS of 13.0 or higher |
Ignore the technical jargon!
Just understand that if you have an Nvidia GPU you’ll see one setting while someone using a Mac will see another setting.
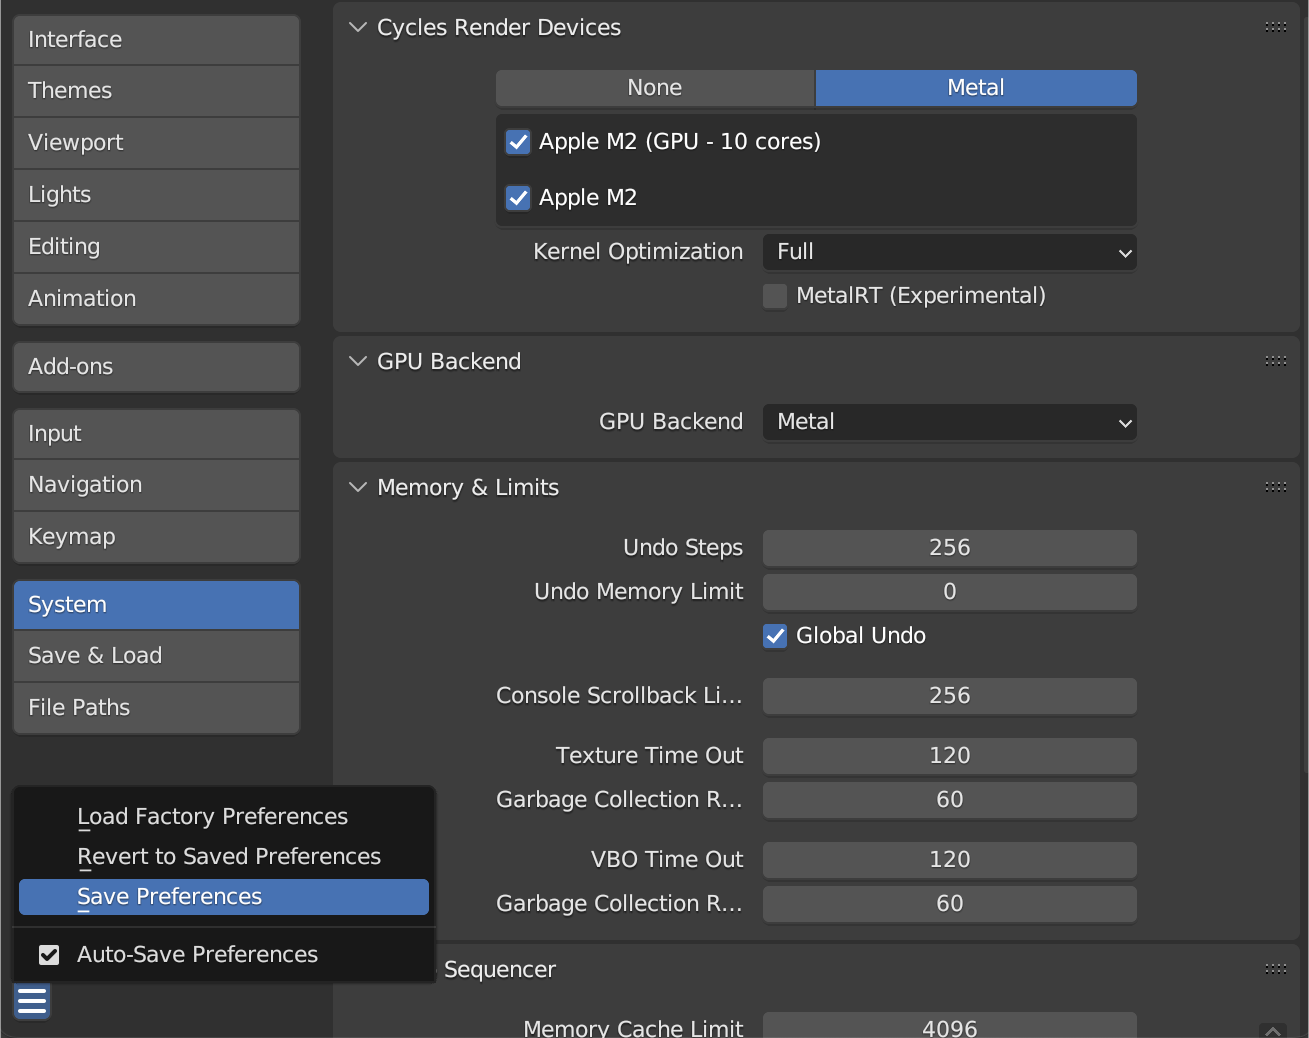
Before closing this window, save your preferences by clicking the bottom left hamburger menu and clicking Save Preferences.
Render Properties
The render properties are accessed by clicking on the camera icon on the right side of the screen.
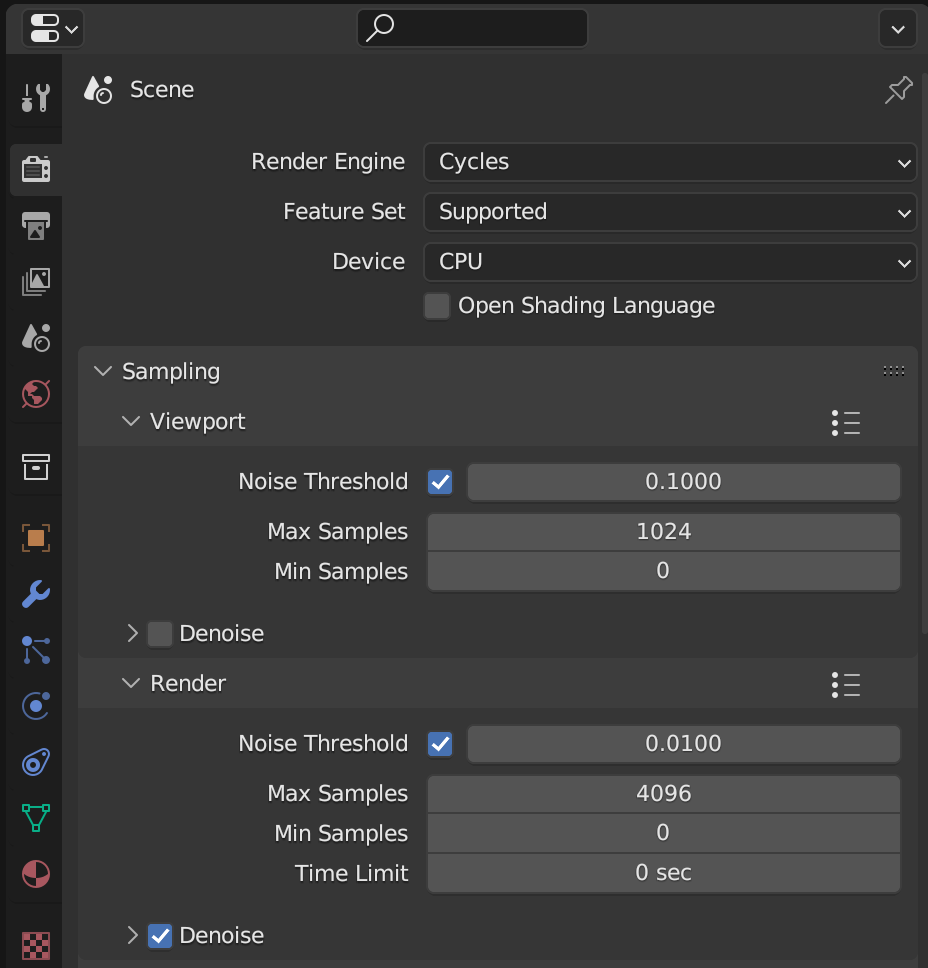
This tab allows you to do many things, but for our purpose we’re focusing on two things:
- Changing the quality of the render
- Optimizing the performance of Blender while modeling in the viewport
Many of these settings will separate by Render (what settings your final image will use) and Viewport (what settings will be used while making changes to your model within Blender).
In general, it is good practice to use lower settings in your viewport to not put stress on your computer’s hardware.
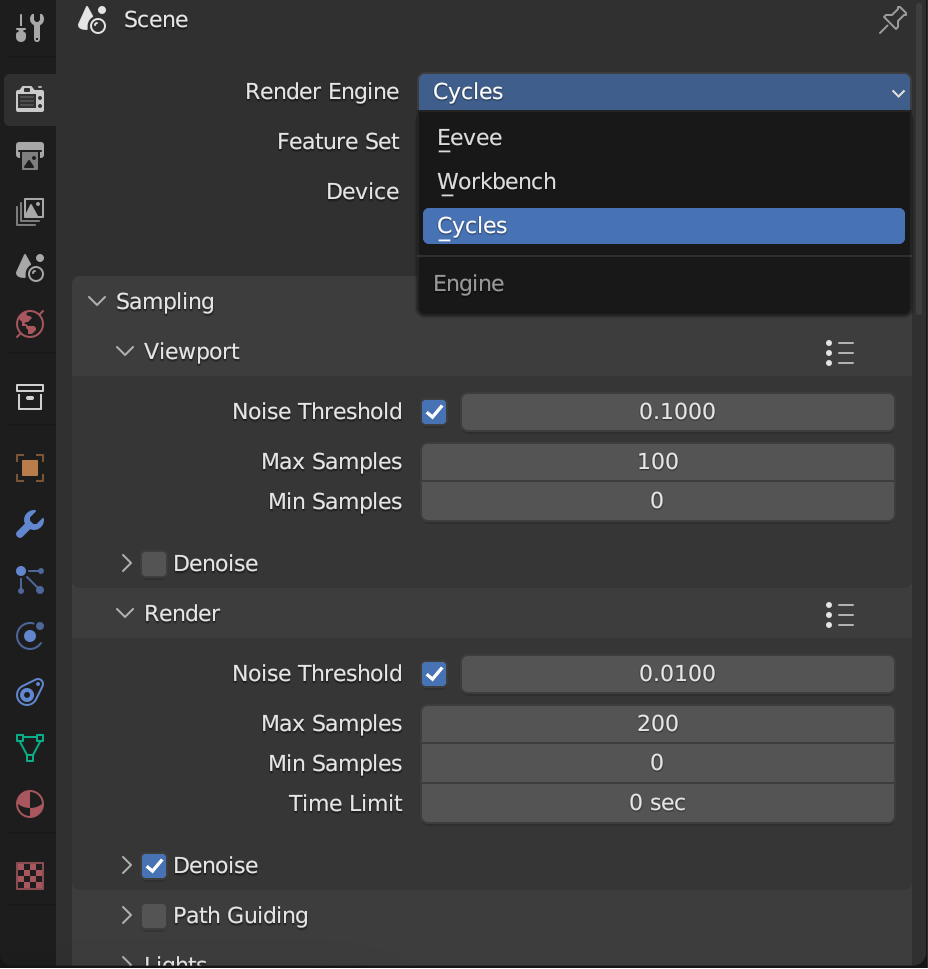
Render Engine
This setting allows you to change between Eevee and Cycles.
We will be using Cycles.
Blender’s Render Engines
Blender has two render engines.
| Eevee | Blender’s real time render engine Rendering will be fast (real time) Used for motion graphics and simple scenes |
| Cycles | Blender’s raytracing render engine Calculates the light as it bounces around your scene Takes multiple images called samples to make a high definition image |
| Workbench | Not a render engine Takes a screenshot of your viewport Not used in final renders |


Device
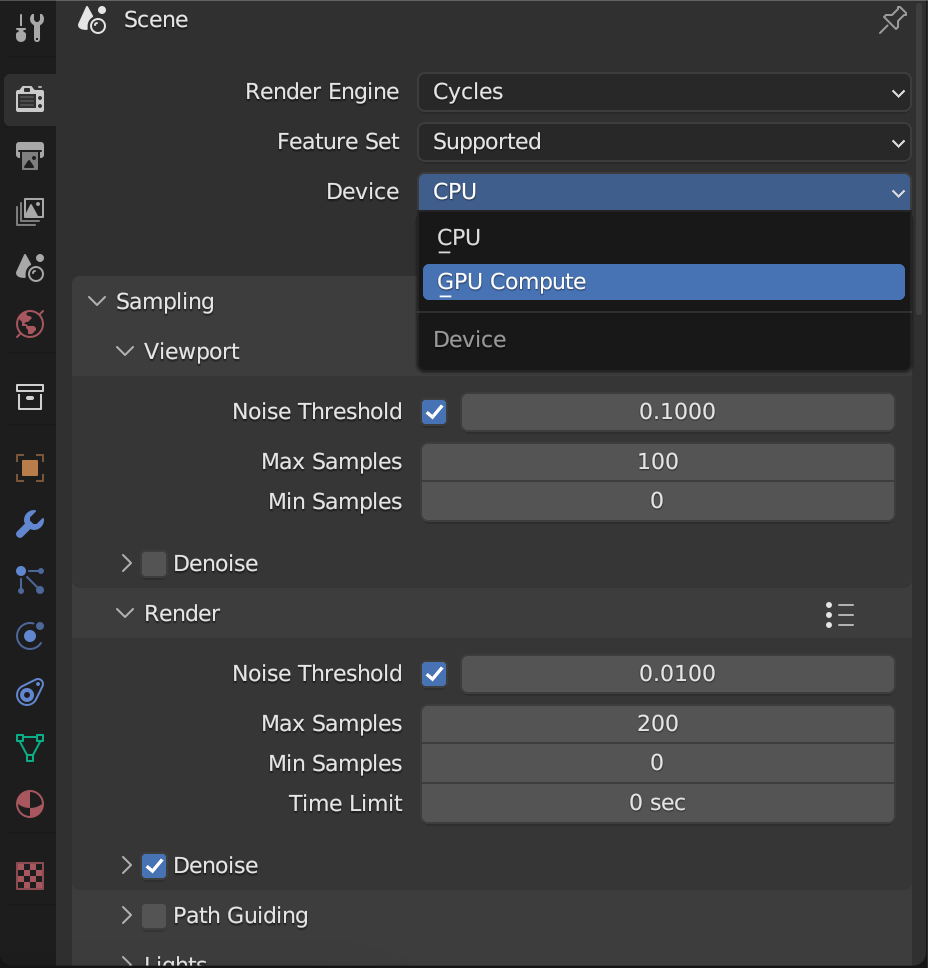
This allows you to choose whether to render from your CPU or GPU.
Remember when you changed the hardware in preferences?
If you changed to something like Optix or CUDA, you will most likely want to use your GPU for rendering.
Sampling
These are settings that will change how Blender will sample your scene.
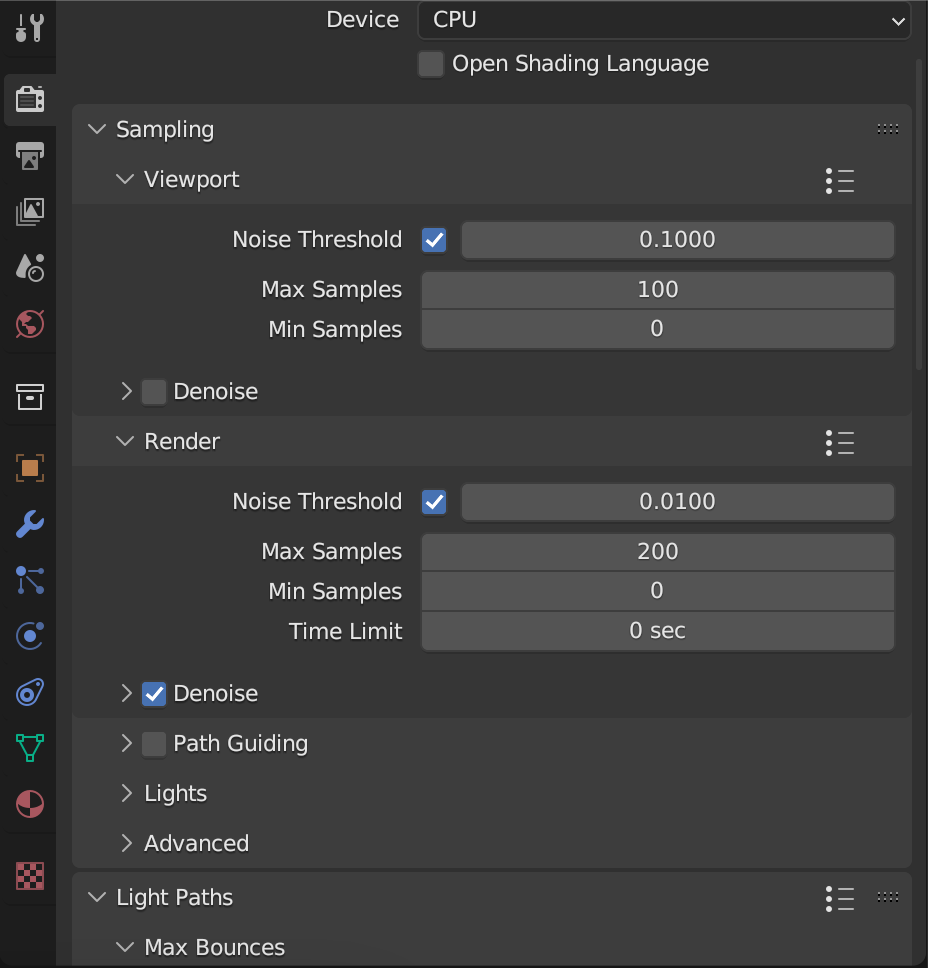
A sample is a snapshot of visual information.
A single sample will be missing a lot of data in the form of empty pixels.
The more times you sample, the fidelity of your render will increase.
Noise Threshold
Noise Threshold allows the render engine to change the amount of noise allowed in a single sample.
This also means that if increase your noise threshold, the quality of the image will be grainy, but the load times will decrease.
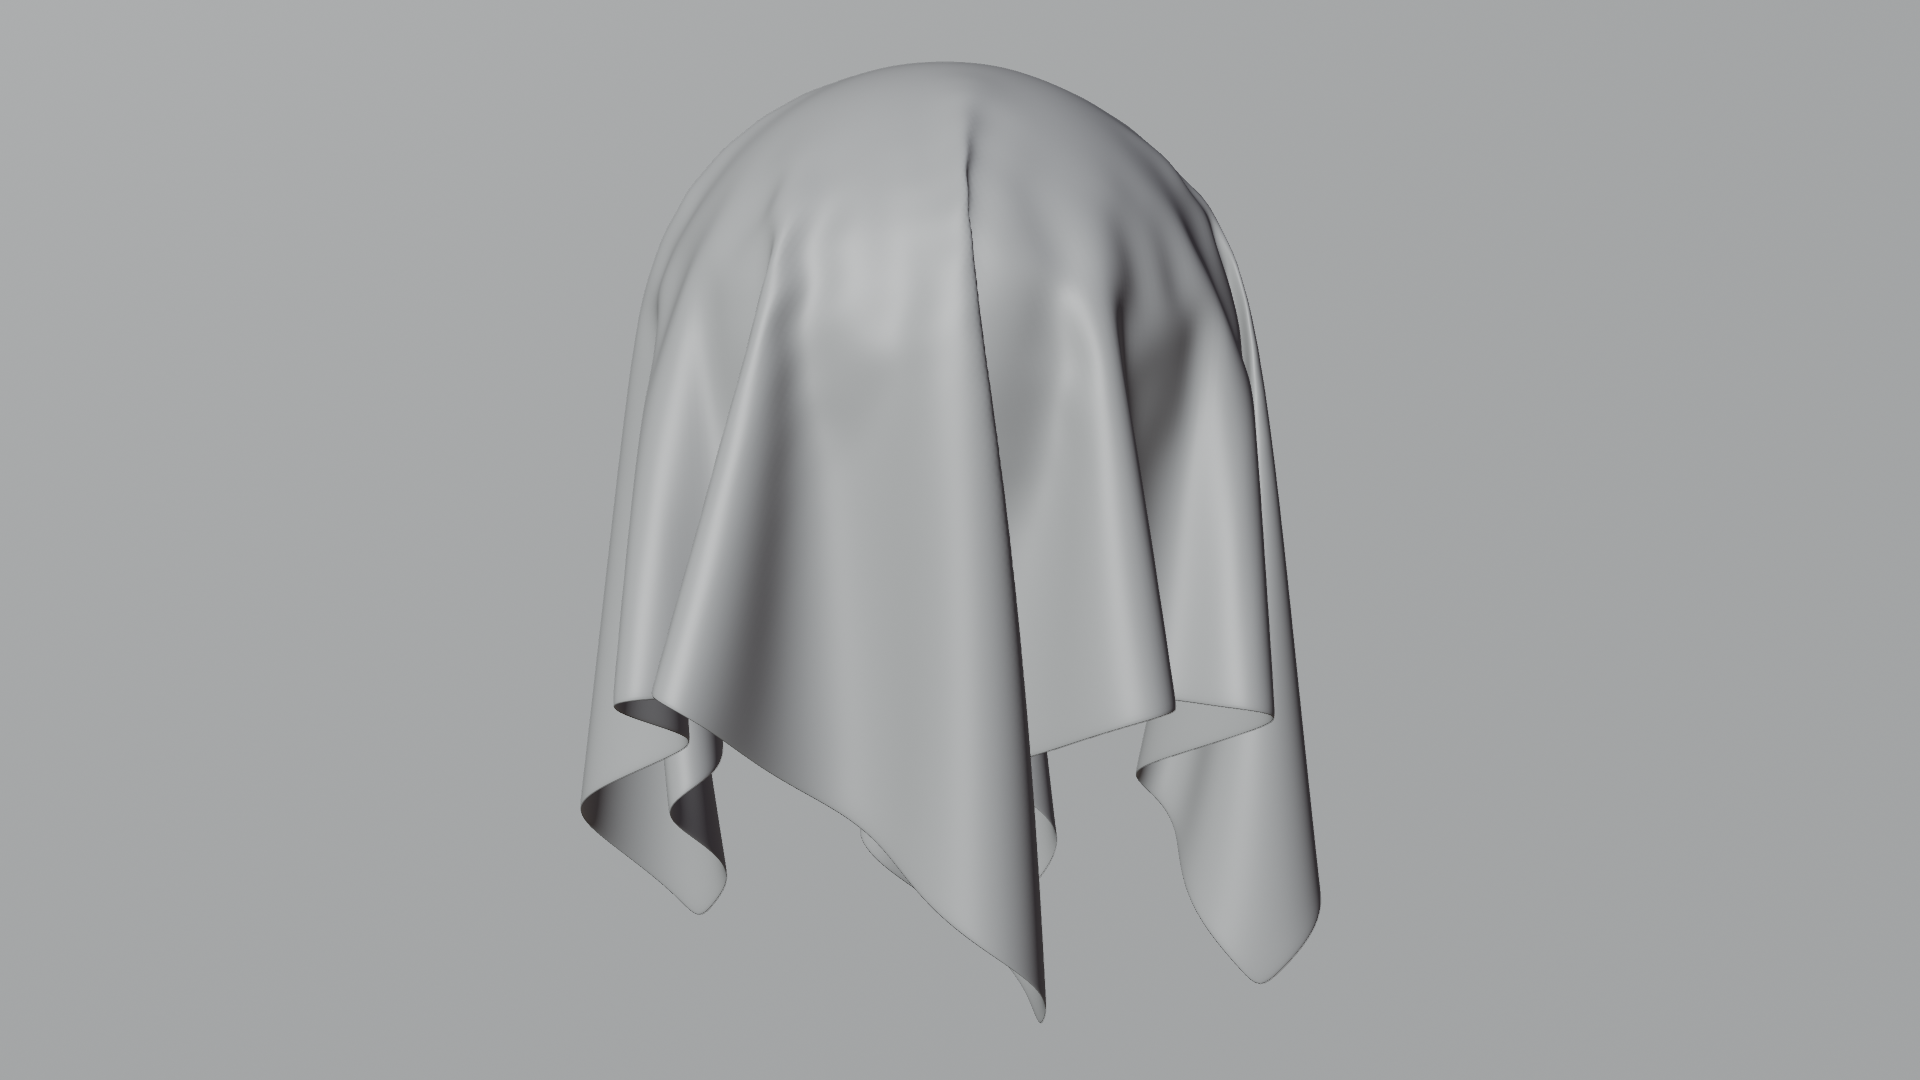
The images below were taken without denoise enabled to show the noise and its impact on render times.



Max Samples
Max Samples increase the amount of samples taken before finishing a render.
Lowering this number will reduce render times, but will potentially impact the quality.
In your viewport, a lower number like 100 samples should be enough.



Denoise
When there are fewer samples than are required to complete an image, you will get a grainy texture where the pixel information has not been sampled.
Adding denoise allows Blender to fill in that missing information automatically.
This should be enabled under Render, but is not required for Viewport.
Color Management
These settings will change the color filters used for your render, but should not have any impact on your render times.
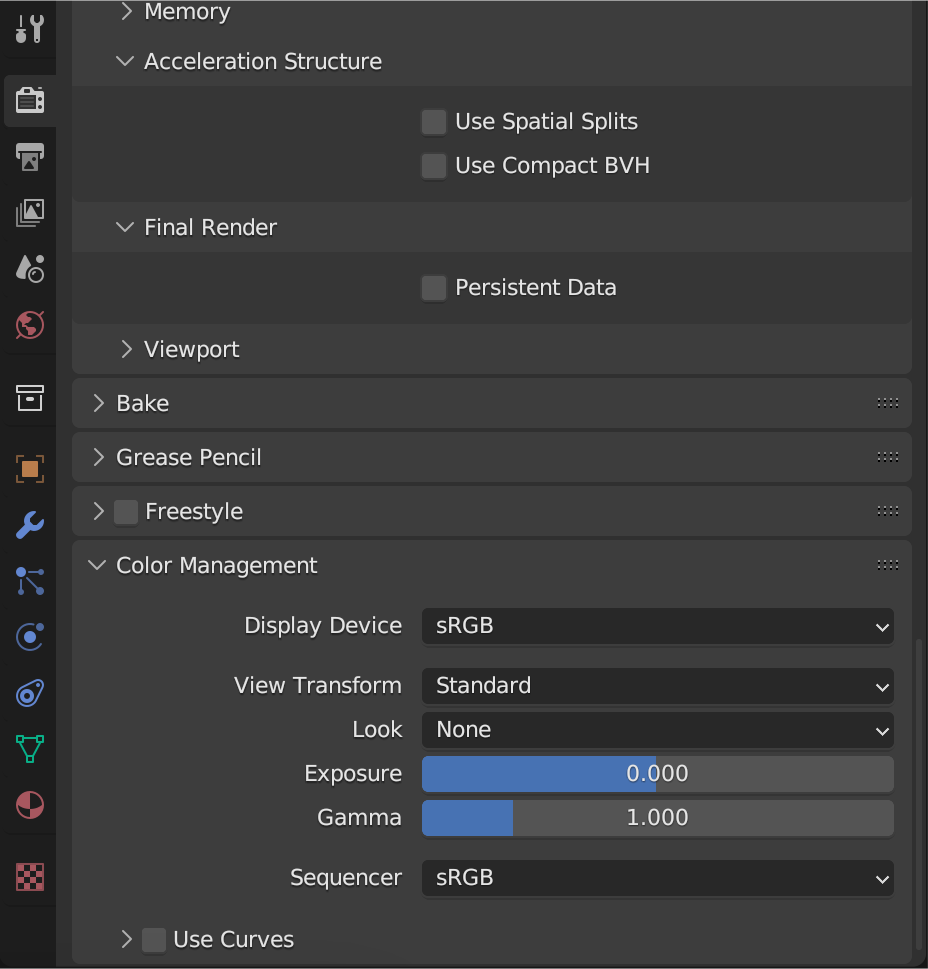
View Transform
This setting will be changed depending on the style of your scene or what you plan to use the render for after Blender.
| Standard | Non-realistic scenes |
| Filmic | Realistic scenes |
| Filmic Log | Exportation of animation for post-processing (Premiere, Resolve, etc.) |
| Raw | Exportation of image for post-processing (Photoshop, GIMP, etc.) |
Look
Look will change the color contrast of your scene.
Alternative Ways to Decrease Render Time
There are additional methods worth mentioning as they may greatly increase your render times with little impact on quality.
Render Properties
Light Paths
Light Paths changes the amount of times light bounces in your scene, also known as ray-tracing.
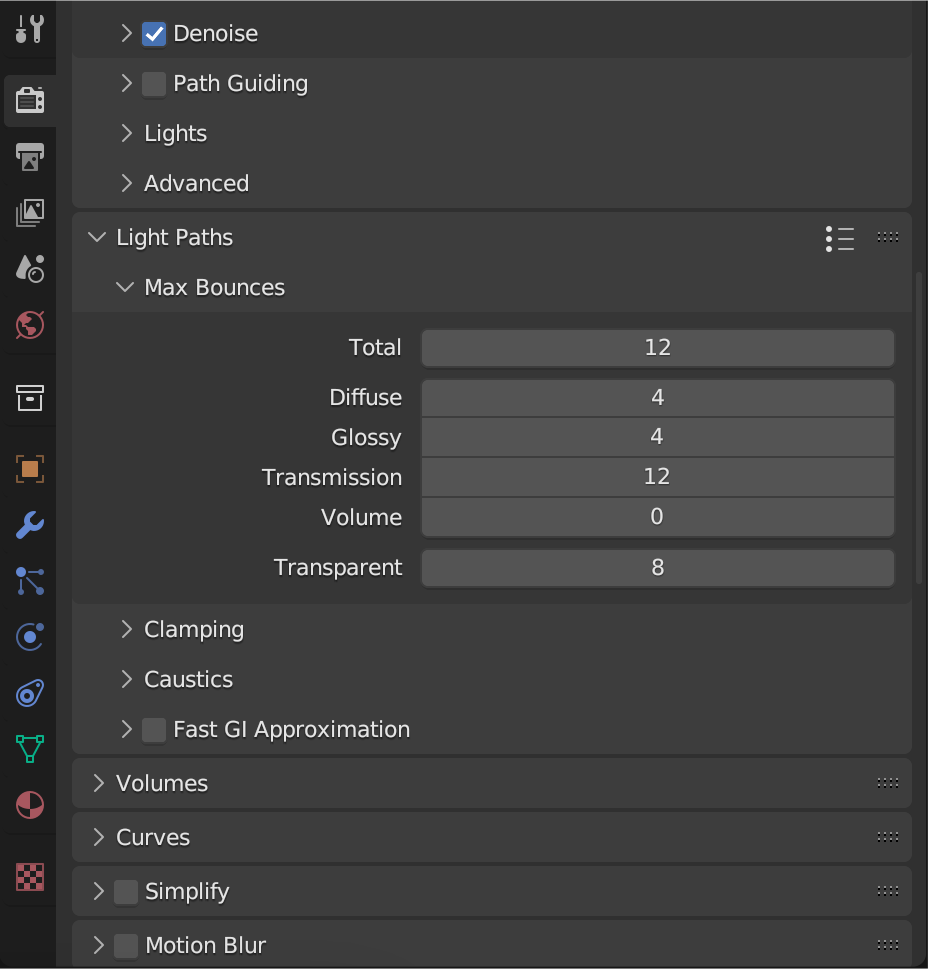
You can decrease everything to 0 and increase each incrementally to see what works best for you.
Performance
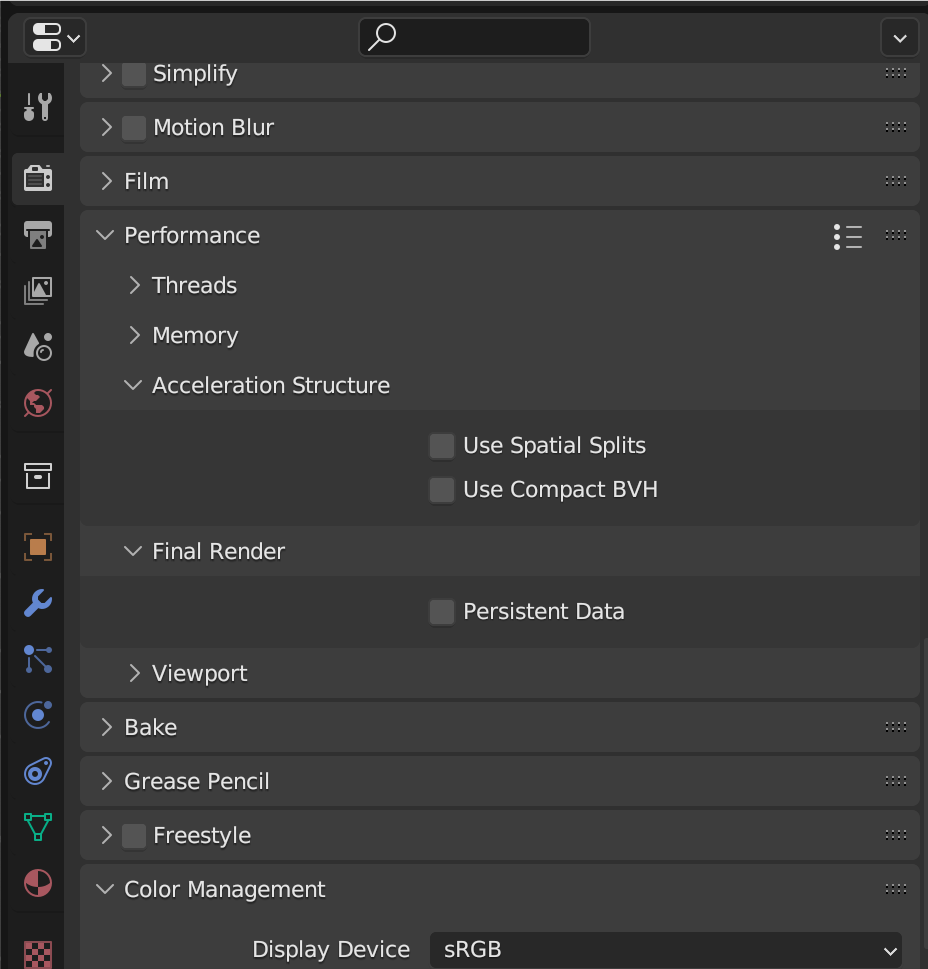
Acceleration Structure
| Use Spacial Splits | Uses more RAM, but renders faster |
| Use Compact BVH | Uses less RAM, but renders slower |
Final Render
| Persistent Data | Stores rendered information like materials, so it doesn’t have to render everything each time you render the same scene |
Modifier Properties
As you model, you probably have used mixture of modifiers.
These are accessed by clicking on the spanner icon on the right side of the screen.
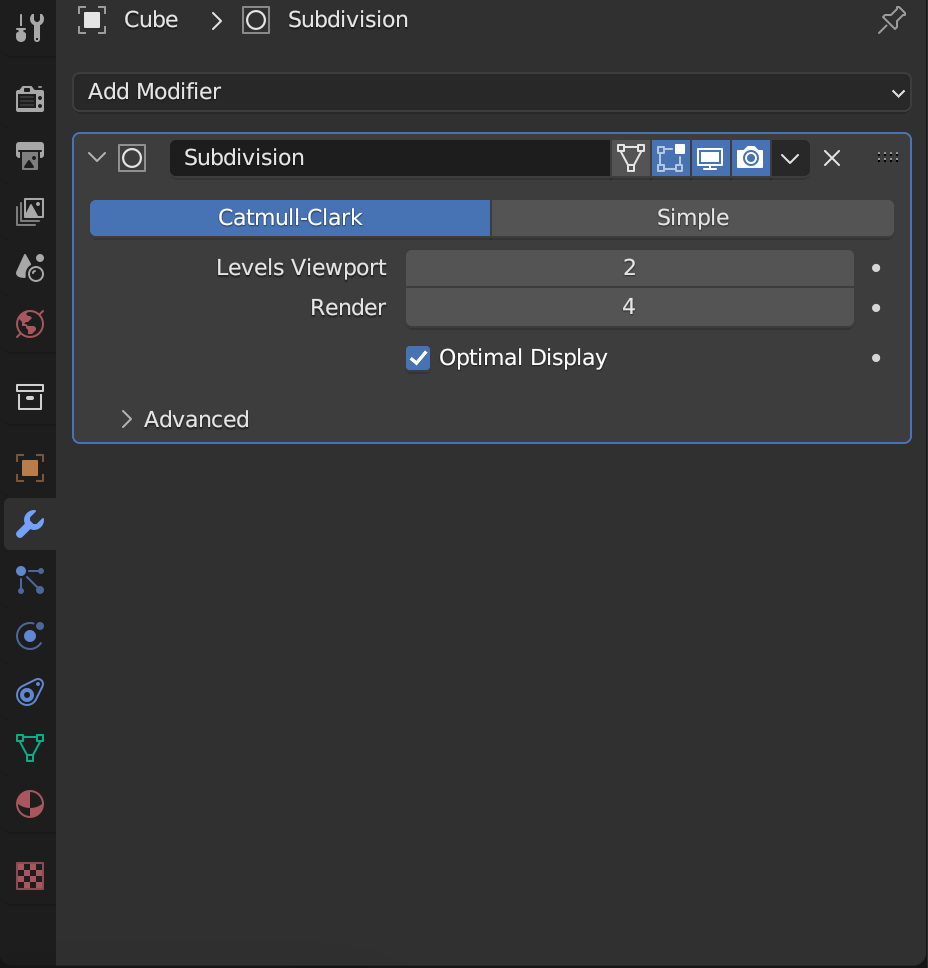
One of the most commonly used modifiers is Subdivision Surface.
This modifier, among many others, will have an option to change the level of detail of the viewport and render independently.
You can keep the Levels Viewport lower, as it Blender can slow down as you model something with a lot of detail.
Hardware
While expensive, upgrading your GPU, CPU, or RAM may give you a significant increase in performance.
Takeaway
Ultimately, experiment with options that are right for your project and computer.
And remember, just because you sample something 4000 times doesn’t necessarily mean you’ll get better results.
If you see a decrease in render times and you think the final render quality was not impacted, perfect!
We hope this gave you a bit more knowledge on rendering, so you can finalize your projects with confidence!
Until next time!